Presenting the Halo Energy Sword~!

I knew what I wanted to do was design a circuit that would be similar in function to the star wars sabers that fans build. That meant animated lights running the length of the twin blades, an accelerometer to gather motion data, and sound playback for startup and swing sounds.
What I ended up doing was designing a circuit around an ATMEGA32 controller chip.
Hit more info for details.
This is a summary page, additional notes are on the forum.
Design
I knew what I wanted to do was design a circuit that would be similar in function to the star wars sabers that fans build. That meant animated lights running the length of the twin blades, an accelerometer to gather motion data, and sound playback for startup and swing sounds.

What I ended up doing was designing a circuit around an ATMEGA32 controller chip. The ATMEGA32 offered me everything I needed at the time, which was serial communication and analog in/out. There was also the benefit that I am familiar with this chip and know it’s documentation well.
Tech – Lights
The lights consist of 66 color changing blue/red LEDs. The lights are connected to the ATMEGA32 via 5 digital outputs and 2 analog outputs.  The 5 digital outputs control the ignite and extinguish animations of the blue LEDs, while an analog output controls the red via PWM.
A unique wiring is used for the color changing LEDs. Bicolor LEDs have 3 leads, a common lead, then one for each color. The normal wiring method is to connect resisters to each color’s lead. I used a single resister on the common lead which makes it impossible to light both colors at the same time (forward voltages are different for each color). But by using the microcontroller’s PWM function, it is possible to make it perceived that both are lit at the same time. Playing with the frequency of the PWM on the red, I found the sweet spot where the red fades up and the blue fades down. This gave the appearance that both were lit at the same time for a purple glow.  The effect is set to fade in and out with a timing that matches the barely audible hum that the in game energy sword produces. On top of the fade effect, there is also a flicker effect that is controlled by the raw output of the analog accelerometer.
For a while I left the PWM on during sound playback, the blade had a neat “lock-on” effect that would turn the blade solid red during a swing. However, the PWM created an annoying feedback on the nearby audio amplifier. So now the sword is solid blue during a swing.

Tech – Motion
The motion chip is an ADXL203 dual axis accelerometer. At first I threw out the idea of an accelerometer because of the surface mount soldering that is required, but later found surface mount soldering by hand is attainable. There are some good tutorials on Sparkfun.
This accelerometer has an analog output (force = voltage level) and is connected to A2D inputs on the ATMEGA32. A programming loop monitors the input then if it detects sufficient motion, the program will fire up the sound subroutines. Motions that do not have sufficient motion for a swing are passed to the lighting functions. The raw data from the accelerometer is given directly to the PWM routines and added to the fade value. Since low motion analog data is susceptible to noise, this gives the appearance of the lights flickering in a truly random effect. This also gives the user the impression that they are in control of the flicker. Slowly waving the sword around gives a unique flicker effect.

Tech – Sound
The sounds were recorded from in game and saved as MP3s. Some work was done in an audio studio to clean up the sounds for playback. At the heart of my circuit is the Vinculum VMUSIC2 MP3 player. This sound module has come to be known to be the best sound effect solution for prop makers. It has a USB port to read a USB memory drive and a serial wire so it can be controlled by your own microcontroller. It can play both MP3 and WAV file types with full bit rate of the MP3.
The only down side of the VMUSIC module is the size. It measures 2.5″x1.5″ which could be considered small, but is difficult to fit into the handle of my prop.
I also considered writing my own playback program or using sound recording chips. Neither of them could compare with the playback audio quality that the VMUSIC module provides.
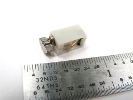
Tech – Amp
The audio amplifier was added as an afterthought and it shows in the design. This is one area that screams improvement needed.
The current solution is a AN7513 1W audio amp chip. This is a small IC that can directly power a small speaker.
The problem is an issue of both volume and sound distortion. The amp is capable of driving the speaker kinda loud, but at volumes louder than 50%, distortion becomes apparent. This limits the speaker volume to household venues.
As an alternative, I added a headphone jack to the design. An wearable small amplifier is connected for usage in noisier locations. Because the headphone output is directly from the MP3 player, it can reliably be amplified to very loud volumes.
Partnership
To ensure the highest quality prop I teamed up with an individual named Sean Bradely. Sean is best known for featuring his previous halo energy sword that he built. His previous sword consisted of a molded handle, flat plexi blades, and glowing EL wire. It was regarded as the most accurate fan made prop energy sword in existence.
I had a mostly functioning circuit when Sean approached me. We decided that we were working toward the same goal and a partnership would allow us to use the best of both our talents to achieve an even more accurate prop.
He had been in the process of designing a new energy sword for quite some time. For the new sword he would have dimensional blades instead of being flat. In this cavity he planned to insert LED rails to maximize the light given off by the blade. My circuit would be perfect for him and his blade and handle molds would be perfect for me.

Vacuformer & Blades
One of the tools to create the dimensional blades was a vacuuformer machine. It was assembled by Sean for this and other projects. I won’t go into it much, but it is an amazing tool to form plastic. More info.
The blades were created on this machine around a wooden buck that Sean cut and sanded into the shape of the blade.

The Handle
The handle is made from an impact resistance resin and was sculpted by Sean. It houses the circuits and has the structural support for attaching the blades.
Improvements
Handle lighting. This was simply a matter of size and time constraints. We wanted to add lighting to the handle and I had designed pins on the circuit to control this lighting. The idea was that the lighting would be bicolor blue white LEDs wired similar to the way that the blue red LEDs were wired. A mix of LEDs directly on the surface and fiber optics for pinpoints of light. The circuit could even blink or fade the handle lights in a pattern to reflect the MP3 player status. Problem came down to fitting it inside the handle along with everything else tightly packed in there.
 Vibration Feedback. Add a pager vibrator motor inside the handle. The motor would be connected to the same PWM signal sent to the blade lights. This vibration would give the sword the missing “hum” effect. The PWM signal is sent in parallel from two controller pins to two driver pins, allowing the circuit to control two devices with the same signal.