Installing an Ammo Counter
This is a small walk through of installing one of my ammo counters available in the store. I am need of pictures, please send me pictures of your install, thanks! :)
Tools Required
- Solder Iron (I bought mine for $5 at menards)
- Solder (I use 60/40, 0.032″ diameter)
- Wire Cutter / Stripper
- Tape
Pregame:
For quick start and demonstration of the counter. Connect the battery to the circuit. Use the red and black wires labeled BATT or BATTERY. Connect black to black, red to red.
No need to solder at this point, just twist the wires together and maybe use some tape so the red bare wire doesn’t touch the black bare wire.
The counter should now be on, take the wire pair labeled FIRE and connect these two wires together. Each time you connect them together, the counter will decrease. Do the same thing for RESET.
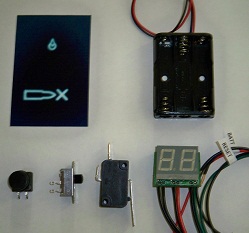
Kit Contents
- Assembled Counter Kit
- AAA Battery Holder
- Pushbutton Switch
- Slide Switch
- Lever Switch
Install
Note: Before getting started
- All wire connections must be soldered. Twisting the wires onto the switch connectors will create a poor and inconsistent connection.
- The included switches only have two connectors. They can be soldered in any order to their associated wires.
- You may need to cut the casing to install the switches through the plastic housing of your gun, so be very certain with where you want them.
- Please read and understand this entire page before cutting anything! thanks
Step 1 – Identify and place FIRE switch
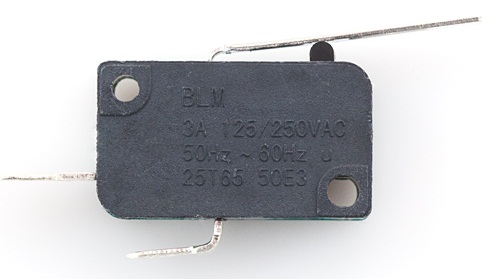
The FIRE switch has a long lever on it. If you have an existing trigger, use the lever to connect to your existing trigger in such a way that when you pull the trigger, it will also push down on the lever switch.
If you do not have an existing trigger, you may use the lever switch as a trigger itself.
Step 2 – Identify RESET switch
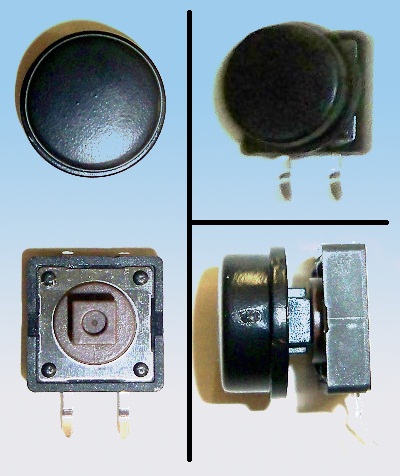
The RESET switch is a square pushbutton. It has a matching round cap. The cap snaps into place on top of the square pushbutton.
Step 3 – Identify ON/OFF switch
The ON/OFF switch is a slide switch. It has mounting holes on either side so it may be fastened down.
Step 4 – Arrange
Carefully arrange the different switches and batteries around your gun. Figure out where you want them. If you cut the casing of your gun, leave an opening so you can run the wires through the hole.
The on/off switch must be placed between the battery location and the counter location.
Step 5 – Wires
Next, install the counter and thread the wires to the various locations.
If the wires are too long, cut them the proper length and re-strip them.
If the wires are too short, you will need to extend them with more wire. Tape any bare exposed wire ends.
Step 6 – Solder On/Off
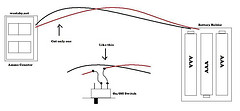 If you have not already done so, please solder the counter battery wires to the battery. Match red to red and black to black. Cover the bare connections with tape.
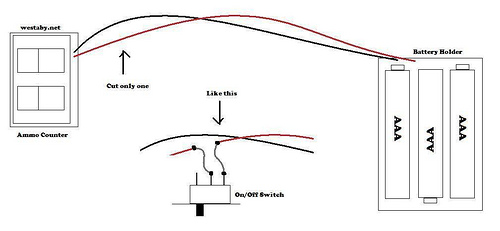
Now you may solder in the on/off switch. The on/off switch is to be installed along the red wire between the counter and the battery. Choose a place along the battery wires to install the on/off switch. Cut the red wire and strip it so you can solder the on/off switch in place.
To the right is a drawing of installing the on/off switch.
Step 7 – Solder FIRE and RESET
Solder the FIRE and RESET switches. As noted previously, these switches only have two connectors. There is no wrong way to connect them to the wire pairs. The only thing you need to be certain of is that the bare wires ends do not touch each other, they should only be connected to the switch connectors.