Alphasmart Pro Mods
Back in 2021, I started work on an embedded word processor based on a Teensy dev board. My design was based on a 40×4 character LCD, sd card and usb host to plug in a keyboard. Editing was limited to typing and backspace. Arrow key support was limited to reviewing previous text, not editing. Worked well enough, but I halted development when I got my hands on an old AlphaSmart Pro.
I remember using the AlphaSmart with great success in the late 90s. So I seeked one out on ebay, so I could benchmark the features on my own embedded word processor. I found no hotkey support and a broken spacebar stabilizer. Making long typing sessions a chore.
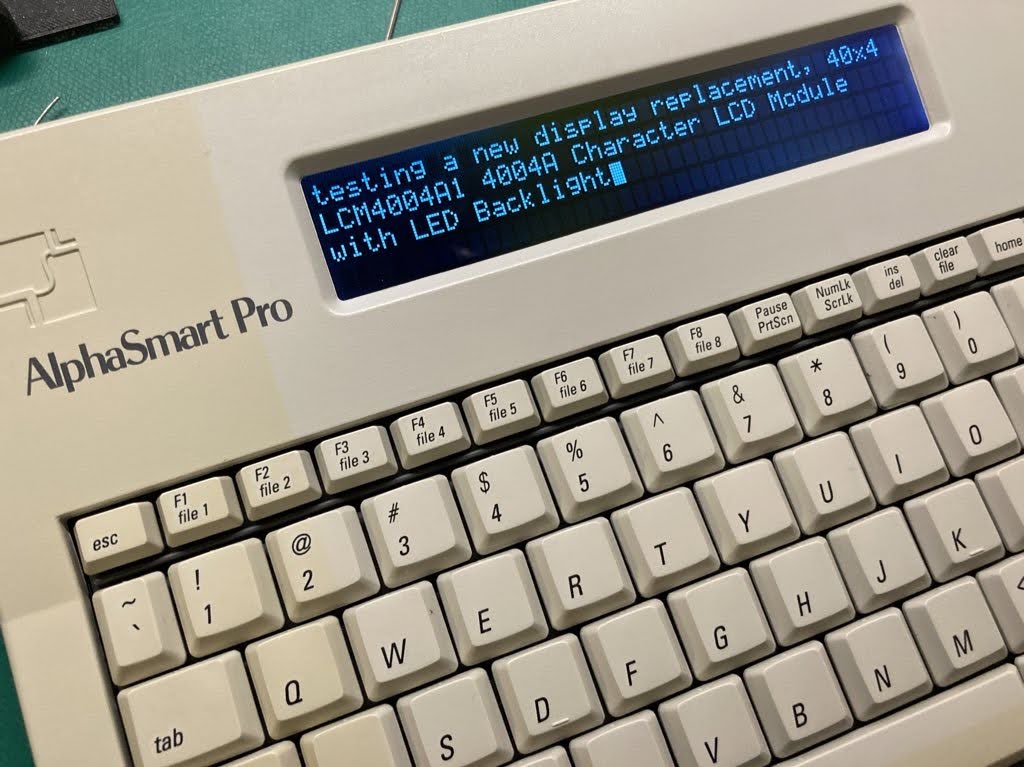
Interestingly, I knew the AlphaSmart used a 40×4 character display. I didn’t realize that it used the same commodity part as me. Aside from the backlight, the display wiring was identical.
I searched around for a fix on the stabilizer bar, and was disspointed in reddit. I couldn’t find a pre-made stabilizer bar that was the size I needed for the AlphaSmart’s unique keyboard. The r/mechanicalkeyboard people were unhelpful, and actively discouraged people from making their own diy stabilizers.
So I made my own. I popped off the shift key to take a closer look at the dimensions of one the existing smaller stabilizers. Measured the diameter as 0.9mm and traced the dimensions on to paper. I couldn’t find this exact diameter metal rod at the hardware store, but I did find 1.19mm brass rods from my local hardware store. Larger than the old bar, but I did some test fits and it seemed ok. I thought I would need special bending tools or a mini torch, but all I used was a pliers to shape the metal followed by a big wire cutter to trim the size. I re-drew my traced small stabilizer to match the wider dimensions needed for the spacebar, and off I went.
The larger diameter did become a problem. While it did fit the spacebar assembly, there was too much friction and the spacebar would get stuck. A few drops of lithtium lube and tada! The spacebar is functional.
You know what… as long as I have the alphasmart on my workbench, I should keep going with the mods.
The 40×4 backlit character display that I was using for my word processor project should fit and is electrically compatible. I spent several weeks writing the software driver and figuring out the wiring for this display. So I have good inuition of what should go where. I wired the new display up and it doesn’t work, lol. Out came the multimeter and discovered the new display was draining the battery, whoops.
What actually was happening was the pinout I guessed was mirror image of the correct wiring. Flipped all the wires and hurrah. The new display was alive. Now for the backlight. In my experiments, I knew the backlight would be ok with the 3V from the 2xAA batteries and turn off around 2.5V. With a current draw of 15 to 50mA. That would be a big reduction of battery life from months down to days. But it works.
All that’s left is closing the case back up. Oh no. Why doesn’t it close? What’s catching. AHHHHH
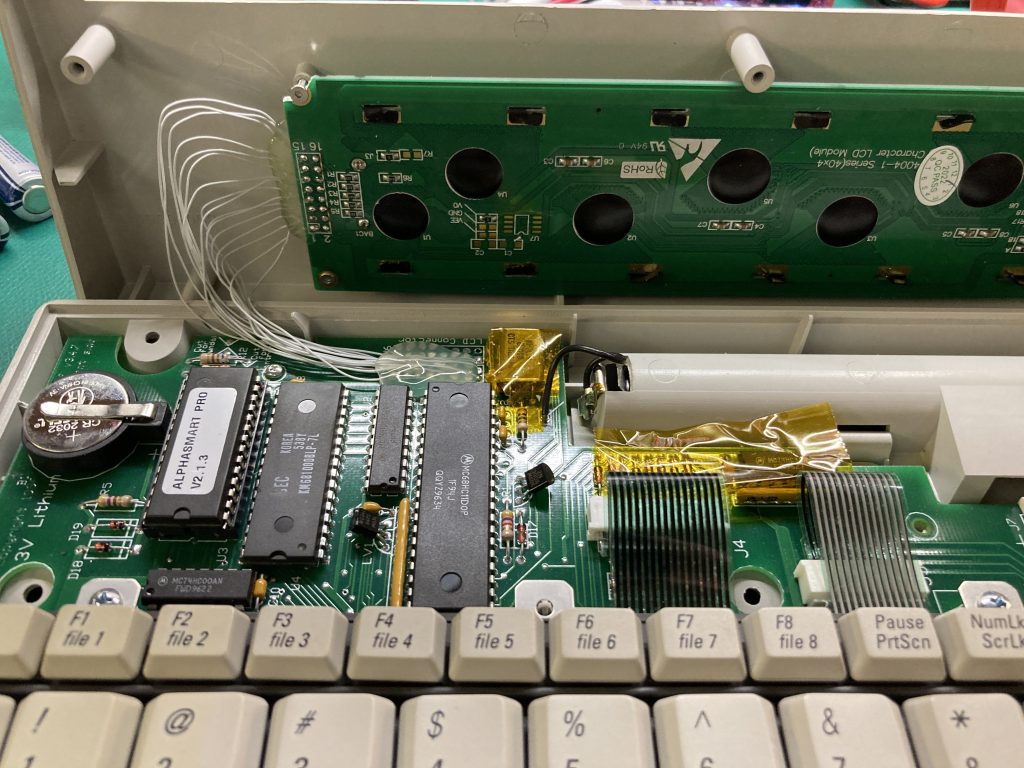
Well, the new LCD bezel is 5mm thicker than the old LCD bezel. Gives room for the backlight diffuser. The thing is that the AlphaSmart was a sleek design and didn’t have an extra 5mm of clearance under the LCD to the main circuit board. In fact, they covered several key spots in kapton tape to protect from short circuits.
So I got to trimming. Removed the LCD pin headers and replaced with 30 gauge wire. Folded the bezel clips flat. Repositioned the tall capacitors. Finally…. the case still didn’t close right… but was close enough. The center screw is 1-2 mm out of alignment, but you can’t tell by looking at the case. Everything appears as it should.
Done.
Next up: USB-C Upgraded Alphasmart Pro using an ATmega32u4 (arduino).
